What is a Minecraft Network?
A Minecraft network allows players to connect to multiple game modes through a single server address. Instead of managing separate IPs for each server, players join through a proxy that seamlessly directs them to different game modes like Survival, Skyblock, or minigames.
Network Architecture
Here's how a typical Minecraft network is structured:
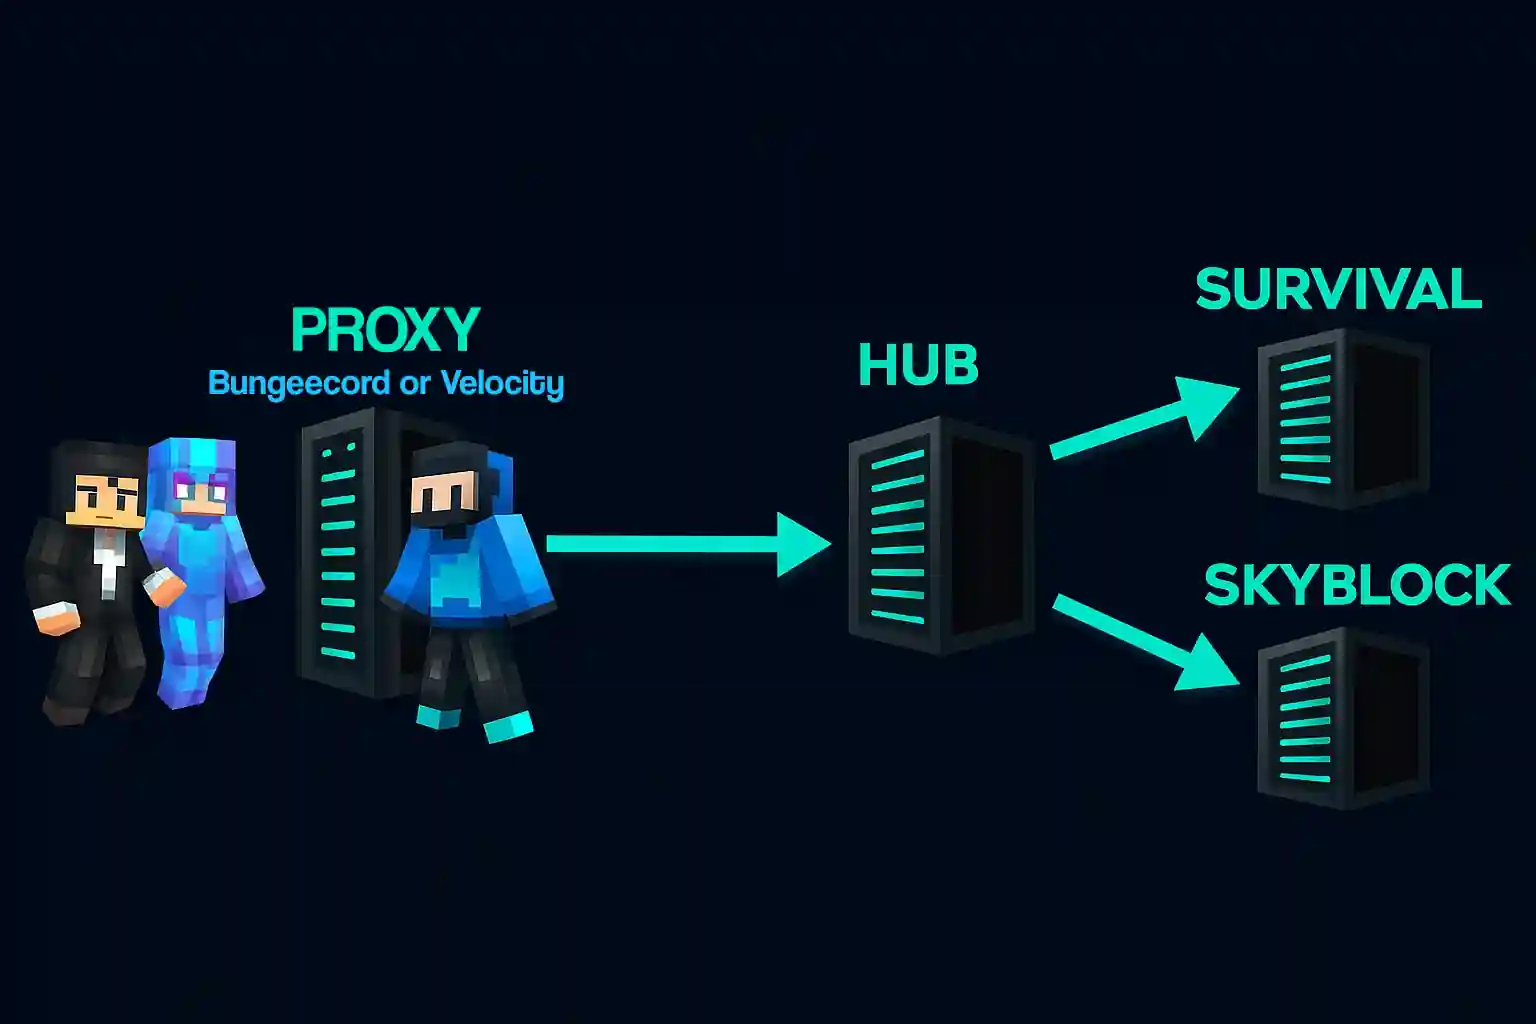
Players connect to your proxy server (Velocity or BungeeCord), which then routes them to a hub server. From the hub, players can choose between different game modes.
Setting Up Your Network
Step 1: Order a Proxy Server
First, you'll need a proxy server to manage connections. MintServers offers dedicated proxy hosting at https://mintservers.com/order/view/26.
During the ordering process, you can choose between BungeeCord or Velocity. We recommend Velocity for better performance and modern features.
Step 2: Set Up Your Hub Server
The hub server is where players first arrive after connecting. It typically contains portals or NPCs to access different game modes.
For a hub server, we recommend our Unlimited Standard plan, which provides ample resources for a lobby environment.
Step 3: Add Game Servers
Now you can add your actual game servers. The required resources depend on your game mode and player count:
- Lightweight game modes (Skyblock, Creative, Parkour): The Unlimited Standard plan works well for these optimized game modes
- Resource-intensive modes (Survival, Factions, Earth): Consider the MAX plan or ULTRA plan depending on your player count and world size
- Minigames (BedWars, SkyWars, PvP): Resource needs vary based on arena count and simultaneous games - Standard or MAX plans typically suffice
- Modded servers: Heavily modded servers require more resources - ULTRA plan recommended for mod packs with 50+ mods
Choose your plan based on expected player count, plugin/mod complexity, and world size. You can always upgrade as your network grows.
Step 4: Configure Your Proxy
Once your servers are running, you'll need to configure your proxy to recognize each server. Add each server's IP and port to your proxy's configuration file (config.yml for Velocity or config.yml for BungeeCord).
Set your hub server as the default/fallback server so players join there first.
For detailed setup instructions, check our Velocity forwarding configuration guide.
Final Steps
After configuration, restart your proxy server and test the connections. Players should now be able to join through your proxy's IP and seamlessly move between servers.
Remember to configure permissions and install any necessary proxy plugins for features like global chat or synchronized ranks across your network.